Easy Diagonal Knit Look Crochet Stitch Tutorial
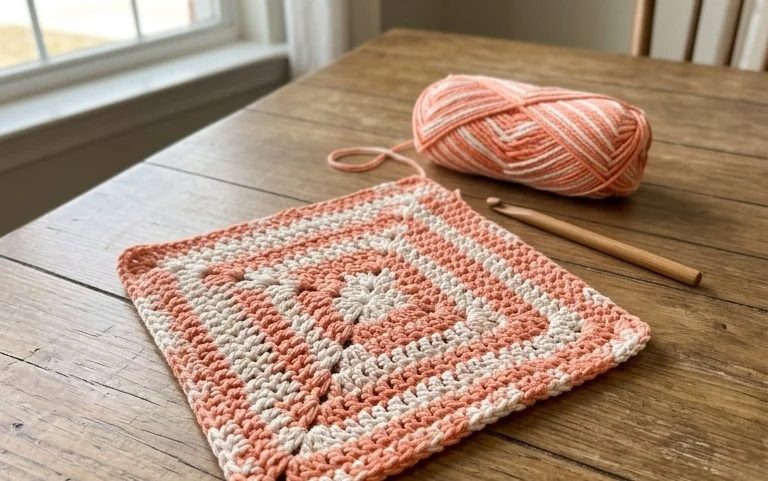
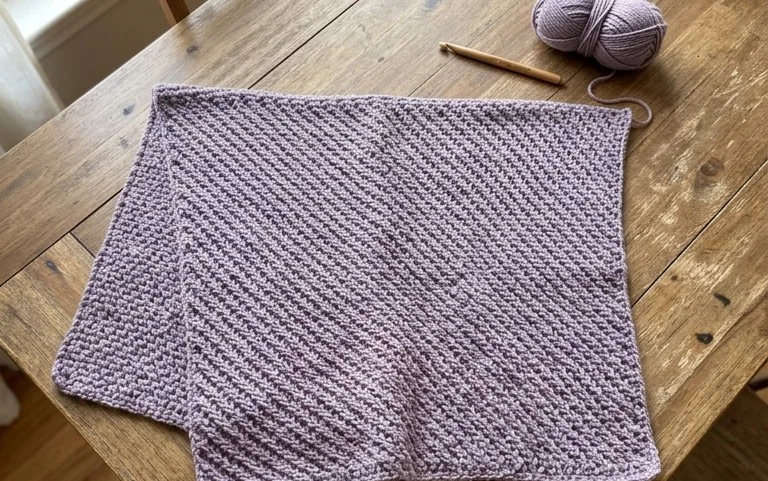
This textured square mimics the clean, slanted lines of knitting using only basic crochet hooks and cotton yarn. It sits heavy and flat on a surface, offering a satisfying weight that prevents sliding when you set down a cold drink. Beginners appreciate how the diagonal knit look crochet stitch builds a sturdy fabric through simple, repetitive motions, while experienced makers find it a peaceful way to clear a yarn stash. You will learn to manipulate your hook to create slanted rows that mimic knitted stockinette. This design suits home decor projects, quick handmade gifts, or coasters, providing a polished result that feels durable enough for years of daily use.
Why You’ll Love This Pattern
This beginner-friendly crochet coaster pattern uses a simple moss stitch variation that creates a dense, absorbent fabric, making it ideal for protecting your furniture from moisture. Because the design is worked in a flat square, you can complete a single coaster in under thirty minutes, which makes it a perfect project for using up small amounts of leftover cotton yarn. The texture is intentionally firm to prevent glass slippage, and the uniform design looks sophisticated whether made in a single solid color or a multi-colored striped sequence. This is a reliable, stress-free pattern that provides a satisfying, quick win for both new crocheters and experienced makers looking for a meditative, repetitive stitch.
I managed to whip up a set of four coasters in one evening while watching a movie. The instructions were easy to follow and the final result lays perfectly flat on my coffee table without curling at the edges.
— Sarah, hobbyist maker
Pattern Overview & Skill Level
- Skill Level: Beginner
- Approximate Time: 25 minutes per coaster
- Construction: Worked in flat rows starting from a foundation chain
- Finished Dimensions: 4 inches by 4 inches
Materials & Supplies Needed
- Yarn: Worsted weight (#4) 100% cotton yarn, approximately 15 yards per coaster. Cotton is essential for heat resistance and absorbency.
- Hook Size: 5.0 mm (H-8) crochet hook.
- Notions: Tapestry needle for weaving in ends, scissors, and optional locking stitch markers to keep track of row ends.
- Safe Yarn Substitutions: Acrylic yarn can be used for decorative purposes but will not absorb moisture effectively and may melt if exposed to very hot mugs. Wool yarn provides a natural look but requires hand washing.
Stitch Guide & Abbreviations (US Terms)
- ch = chain
- sc = single crochet
- st(s) = stitch(es)
- turn = turn your work to begin the next row
- sk = skip
- sp = space
Step-by-Step Pattern Instructions
Coaster Body
- Row 1: Ch 16. Sc in the second ch from hook and in each ch across. Turn. (15 sts)
- Row 2: Ch 1, sc in each st across. Turn. (15 sts)
- Row 3: Ch 1, sc in the first st, *ch 1, sk 1 st, sc in the next st; repeat from * across. Turn. (8 sc, 7 ch-1 spaces)
- Row 4: Ch 1, sc in the first sc, sc in the first ch-1 sp, *ch 1, sk the next sc, sc in the next ch-1 sp; repeat from * until the last st, sc in the last st. Turn. (9 sc, 6 ch-1 spaces)
- Row 5: Ch 1, sc in the first st, *ch 1, sk 1 st, sc in the next ch-1 sp; repeat from * across to the last 2 sts, ch 1, sk 1 st, sc in the last st. Turn. (8 sc, 7 ch-1 spaces)
- Rows 6-16: Repeat rows 4 and 5 consecutively until the piece measures approximately 4 inches square.
- Row 17: Ch 1, sc in every sc and every ch-1 sp across. (15 sts)
Finishing
Fasten off your yarn, leaving a 6-inch tail. Use your tapestry needle to weave the yarn tail securely back and forth through the stitches on the back side of the coaster. Trim any excess yarn close to the fabric to ensure a neat finish.
Care & Washing Instructions
- Hand wash in cold water using a mild detergent to preserve the shape and color of the cotton fiber.
- Lay the coaster flat on a clean towel to air dry, reshaping it with your hands while damp to ensure it remains a square.
- Do not tumble dry, as high heat can shrink cotton yarn and cause the coaster to become stiff or misshapen.
Pro Tips & Common Mistakes to Avoid
Maintain consistent tension throughout your work by holding your yarn with a steady grip, as loose stitches can lead to a floppy coaster that does not lay flat. Always place a stitch marker in the first stitch of every row to ensure you are not accidentally dropping stitches at the edges, which is a common mistake that causes the sides to slant inward. If you want a larger coaster, add chains in multiples of two at the beginning, noting that this will require more yardage per piece. When weaving in your ends, always weave through the back loops of the stitches to keep the tail hidden from the front of the work.
Frequently Asked Questions
Can I use a smaller hook to make the coaster tighter?
Yes, using a 4.5 mm or 4.0 mm hook will create a tighter fabric with less visible gaps between stitches. Keep in mind that this will result in a smaller finished dimension unless you increase your starting chain length.
Is this pattern suitable for complete beginners?
This pattern is excellent for beginners because it only requires basic single crochet stitches and chain spaces. The repetitive nature of the rows helps you practice maintaining even tension, which is the most important skill for new crocheters.
Can I sell the finished coasters I make from this pattern?
You are welcome to sell finished items made from this pattern on a small, handmade scale. Please credit the original design when listing your products online.
How do I adjust the size of the square?
To make the coaster larger, increase your foundation chain by any even number. To make it smaller, decrease your foundation chain by any even number. Ensure your final row count matches your starting width to keep the shape as a perfect square.
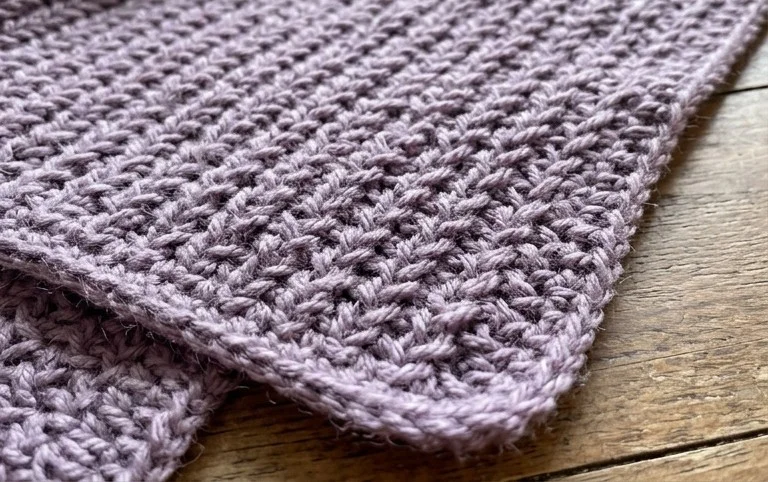
Your finished project now brings a clean, modern texture to your coffee table, showing off a professional look that hides the yarn tails completely. You might consider using a variegated cotton yarn for your next set to emphasize the slanted lines, or scale up your foundation chain to create a larger desk mat for your laptop. Please share a photo of your work on your favorite social media channel so others can see your color choices. Browse through the rest of the blog for more free patterns that rely on simple techniques to build unique, everyday home items.